

How To Clean 1996 Tacoma Egr Valve
Acura MDX EGR Valve Replacement Guide
How to make clean or change the EGR (frazzle gas recirculation) valve in a 1st generation 2001 to 2006 Acura MDX.
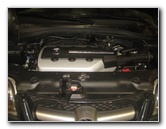
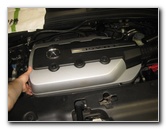
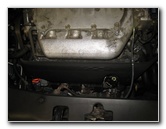
2006 MDX Engine Bay
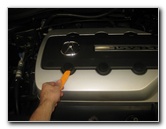
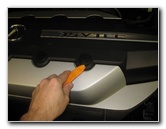
Pry Off Commodities Caps
Four Outer Round Covers
Owners of other Acura or Honda vehicles such equally the RDX, ILX, TLX, RLX, TL, CL, RSX, RL, TSX, ZDX, NSX, Integra, Pilot, Accordance, Borough, Fit, Clarity, CR-V, CR-Z, HR-V, Odyssey, Chemical element and Ridgeline may too find these DIY instructions to be helpful.
A few compatible replacement EGR valves with their part numbers are equally follows: Standard Motor Products EGV658, EvanFischer EVA122828256, Wells EGR4175, PT Auto Warehouse EGRV658, OEM 9164, Airtex 4F1001 and the OEM Acura 18011-RCA-A00.
The tools needed to complete this procedure include a small plastic pry bar tool, a 10mm socket with a 1/4" drive ratchet, a flathead screwdriver, a spray can of penetrating oil, a 12mm socket with an extension bar and a three/viii" drive ratchet.
Some symptoms of a clogged or declining EGR valve include poor fuel economy (lower MPG), loss of power, crude idling, misfires, detonation (knocking / pinging), stalling and difficult starting. You may likewise come across a CEL / SES (check engine light / service engine soon) and/or the VTM-4 warning light with an engine error code of P1491 or P0401.
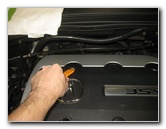
Rear Right Comprehend
Front Right Comprehend
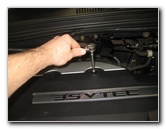
Loosen Counterclockwise
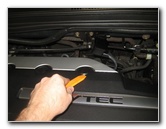
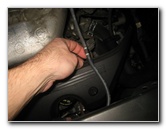
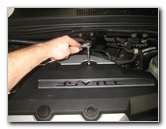
Utilise a small plastic pry bar tool to gently pop out the four round black plastic bolt covers at the corners of the engine cover.
(The two center covers are decorative simply and do not need to be removed.)
Set the four commodities caps aside in a rubber place.
Rear Right Commodities
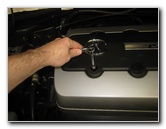
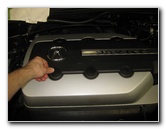
Remove Front end Right Bolt
Plastic Engine Embrace
Ready the four bolts aside in a prophylactic identify.
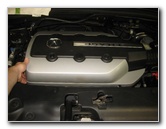
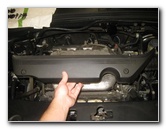
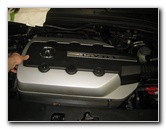
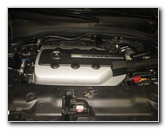
Remove Manifold Cover
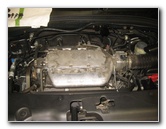
Height of Engine Exposed
Air Intake & Throttle Trunk
Plastic Ignition Coils Cover
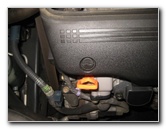
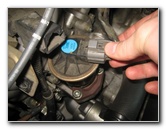
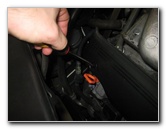
Round Plastic Fastener
1/4 Turn Counterclockwise
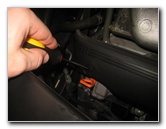
Rotate the fasteners 1/four plough counterclockwise to unlock them.
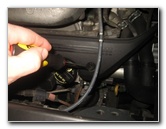
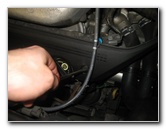
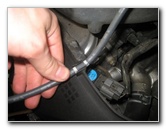
Release Right Side Fastener
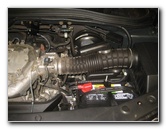
Pull Off Rubber Hose
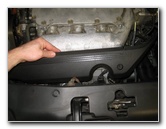
Lift Off Plastic Cover
Elevator off the plastic encompass to reveal the forepart 3 ignition coils.
Set the cover aside in a condom place.
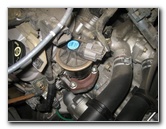
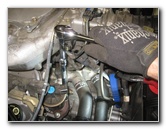
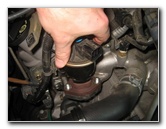
Old EGR Valve
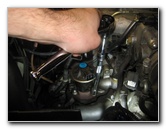
Push In Release Tab

Disconnect Power Plug
Gently push in the release push button on the grayness plastic electrical connector earlier sliding it straight off.
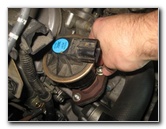
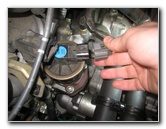
Electrical Connector Removed
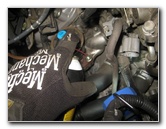
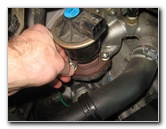
Spray With Penetrating Oil
12mm Socket & Extensions
There accept been reports of the EGR valve mounting studs breaking off due to the nuts being corroded (rusted) in place.
Wait at to the lowest degree a few minutes for the penetrating oil to piece of work.
Attach the 12mm socket to a long extension bar. You could also just employ a standard 12mm wrench.
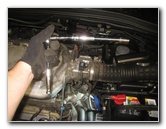
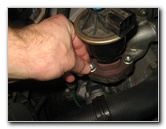
Loosen Counterclockwise
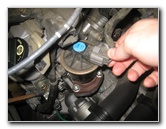
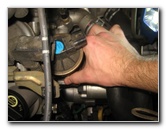
Spin Off 12mm Nuts

12mm Nuts Removed
Spin off the nuts past manus to prevent from having them fall downwardly into the engine bay.
Set the 2 12mm nuts aside in a safe place.
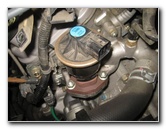
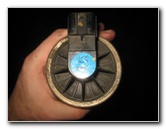
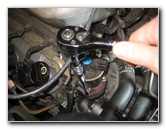
Pull Off Old EGR Valve

Inspect EGR Valve

EGR Ports
Inspect the EGR valve and also the ports on the engine.
Siemens AC01 3005E 389780
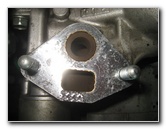
Make clean EGR Ports
Install New EGR Valve
I recommend buying the Standard Motor Products EGV658 EGR valve since it has excellent reviews on Amazon.
If you would like to try cleaning the sometime EGR valve to see if that clears your CEL (SES) lite and P1491 or P0401 mistake codes, use some Throttle Body Cleaner spray or carburetor ("carb") cleaner.
Be certain to cover the diaphragm and electronics on the top part of the old EGR valve with a plastic bag to protect them from the cleaning spray.
Allow the cleaner spray to deliquesce the carbon deposits and flush them away. You could besides gently use a wire brush to clean the carbon from the EGR valve and the ports (holes / openings) on the engine.
Another method is to use a wet/dry shop vacuum and a small flathead screwdriver to carefully scrape away the built up carbon deposits on the valve and ports while removing them with the suction from the vacuum.
Spin On 12mm Basics
Tighten Clockwise
Two compatible replacement gaskets for the EGR are part number Standard Motor Products VG6 or Fel-Pro 70978.
If you lot are re-installing the cleaned one-time valve, make sure that the metal gasket is properly positioned on the engine.
If you purchased a new valve, information technology should take included a new gasket.
Lower the new (or cleaned) EGR valve down into place.
Spin on the 2 12mm nuts a few turns by hand in the clockwise direction to prevent them from becoming cross threaded.
Torque To xvi lb-ft
Electric Connector
Push On Power Plug
If y'all take a torque wrench, the service manual specification for the 12mm basics is 16 lb-ft.
Push the electrical connector straight on to the valve until it clicks deeply into place.
Supervene upon Forepart Lower Cover
i/4 Plow Clockwise - Lock
Secure 2d Fastener
Button the two fasteners back into their holes on the mounting bar.
Rotate the two fasteners i/iv turn clockwise to secure them in identify.
Re-Adhere Rubber Hose
Supplant Engine Comprehend

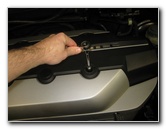
Spin In 10mm Bolts
Lower the plastic engine cover back into place.
Line up the commodities holes in the plastic comprehend with their corresponding holes in the manifold cover.
Spin in the four 10mm bolts a few turns in the clockwise direction by mitt to prevent them from becoming cross threaded.
Tighten Clockwise
Snap On Bolt Caps
EGR Valve Replaced
Try to avoid over tightening the bolts to foreclose from cracking the plastic encompass.
First the engine and mind closely for any strange sounds.
If you lot demand to clear the DTC (diagnostic problem codes), use an OBD2 scanner or you tin can try disconnecting the 12V automotive bombardment for at least 15 minutes.
Be certain to record the EGR valve cleaning or replacement in your SUV'due south service records.
For more, please check out all of my 2001-2006 Acura MDX DIY Repair & Maintenance Guides.

Source: https://www.paulstravelpictures.com/Acura-MDX-EGR-Valve-Replacement-Guide/index.html
Posted by: maydins1939.blogspot.com
0 Response to "How To Clean 1996 Tacoma Egr Valve"
Post a Comment